Installing Shader Graph for Unity
Some of our prefabs require Shader Graph and z3y’s Shader Graph fork for advanced visual effects like liquid shaders. Shader Graph allows you to easily edit and customize shaders visually, while z3y’s fork ensures compatibility with VRChat's rendering pipeline.
This guide will walk you through the process of installing both Shader Graph and z3y’s Shader Graph package.
Important: This guide is for Unity 2022.3.6f1. The steps may differ in future versions of Unity.
What is Shader Graph?
Shader Graph is a Unity tool that enables the creation of shaders using a visual interface instead of code. It’s particularly useful for creating complex visual effects like liquid shaders, and it allows creators to make adjustments without deep programming knowledge.
For more information, see the Unity Shader Graph Documentation.
Requirements
Before starting, ensure you have the following:
- Unity Shader Graph installed via the Unity Package Manager.
- z3y’s Shader Graph Fork for VRChat compatibility.
- A Unity project set up with the proper rendering pipeline. Currently VRChat supports
Default Render Pipeline
Installation Steps
1. Install Shader Graph

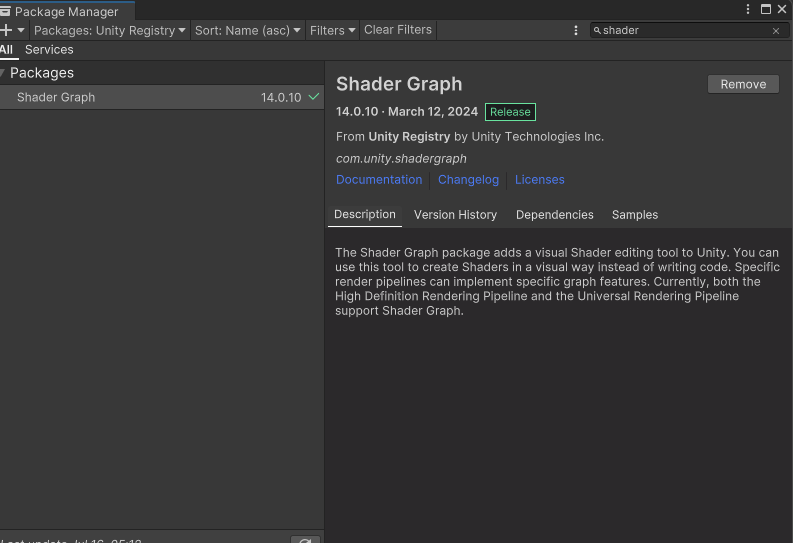
- Open Unity and navigate to Window > Package Manager.
- In the Package Manager, ensure Unity Registry is selected in the dropdown menu.
- Search for Shader Graph.
- Select Shader Graph from the list and click Install.
2. Add z3y’s Shader Graph Repository
To use advanced liquid shaders, you’ll need to add z3y’s Shader Graph package.

- Open VRCCreatorCompanion.
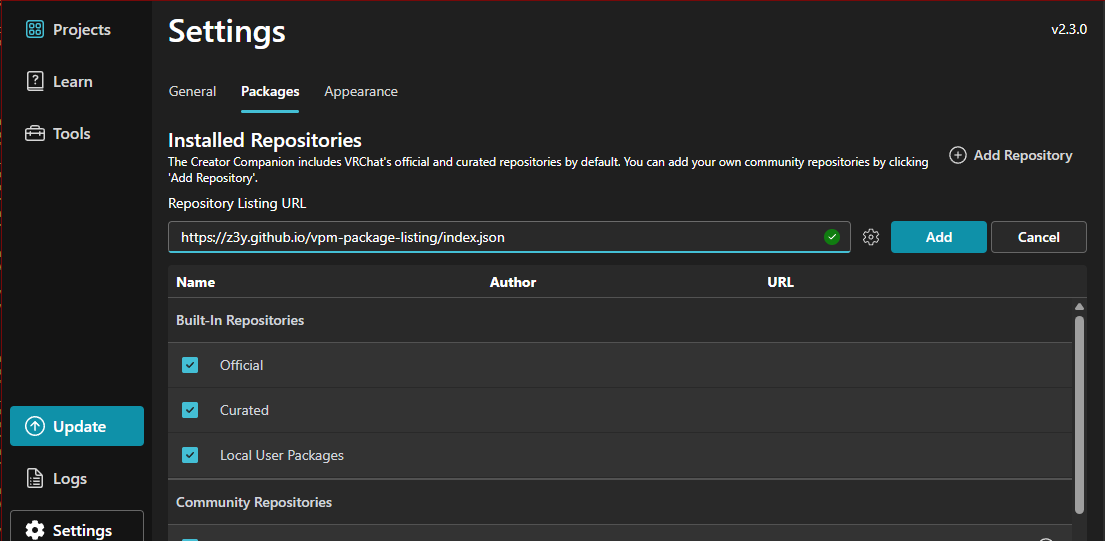
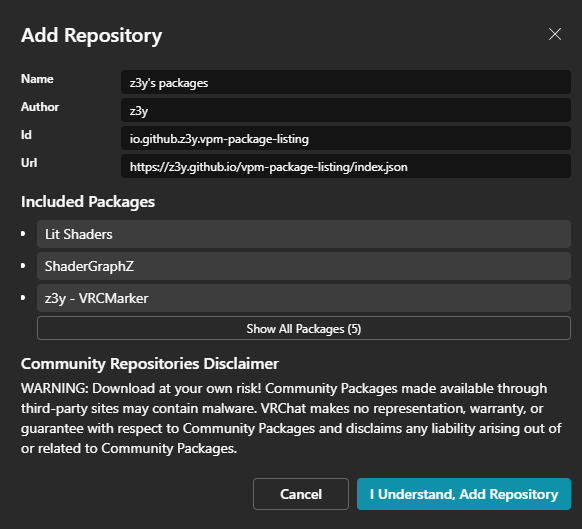
- Go to Settings > Packages > Add Repository.
- Enter the repository URL: https://z3y.github.io/vpm-package-listing/index.json.
- Click Save.
3. Install z3y’s Shader Graph Fork

- Return to the VRCCreatorCompanion main menu and click Manage Project for your active Unity project.
- Search for Shader Graph Target (z3y) in the Package Manager.
- Select the latest version and click Install.
4. Configure Shaders for z3y Compatibility
For existing shaders, follow these steps to ensure compatibility with z3y’s fork:
- Open the Shader Graph file you want to update.
- In the Shader Graph Editor, go to the Inspector panel.
- Add a new target by selecting Built-In (z3y).
- Save your Shader Graph file to apply the changes.
Fixing Older Shaders
If you�’re using an older version of Hash Studios Liquid Shaders or any incompatible shaders:
- Open the Shader Graph file for the affected shader.
- In the Inspector, ensure the target is set to Built-In.
- Add an additional target by selecting Built-In (z3y).
- Save the shader and test in Unity.

Creating a New Shader with z3y’s Shader Graph
If you want to create a new shader for your project:
- Open Unity and go to Assets > Create > Shader > PBR Graph.
- In the Shader Graph Inspector, select Built-In (z3y) as the target.
- Design your shader using nodes in the Shader Graph Editor.
- Save the shader and apply it to your materials.
Using z3y’s Shader Graph Fork Outside VRChat (Optional)
If you wish to use z3y’s Shader Graph fork in non-VRChat projects:
- Visit the z3y GitHub repository.
- Download the Unity package from the Releases section.
- Import the package into your Unity project.
- Follow the standard Shader Graph installation and configuration steps.
Troubleshooting
Shader Graph Not Found
- Ensure you’re using Unity 2022.3.6f1 or higher.
- Verify that the Unity Registry is selected in the Package Manager.
z3y Repository Errors
- Double-check the repository URL: https://z3y.github.io/vpm-package-listing/index.json.
- Ensure you’re using the latest version of VRCCreatorCompanion.
Shader Effects Not Working
- Confirm that the shader target is set to Built-In (z3y).
- Rebuild and reimport the shader file in Unity.
By following this guide, you can install and configure Shader Graph and z3y’s Shader Graph fork for advanced shader functionality in your Unity project. For more details, visit the z3y Shader Graph GitHub or the Unity Shader Graph Documentation.