Adding Images and Creating Sprites for Prefabs
Sprite Conversion: You will likely need to convert your images to sprites to add them to most of our prefabs. Please ensure your images are properly converted to avoid compatibility issues.
Some of our prefabs have menus that display images. These images are displayed using something called Sprites in Unity UI. This guide will walk you through the process of converting an image to a sprite and using it in Unity UI, as well as how to change the resolution of your sprites to reduce file size.
Unity UI and Canvases
Unity UI is a built-in feature of the Unity engine that allows developers to create user interfaces for their games and applications. A Canvas is a component that represents the area where UI elements like buttons, text, and images are drawn. Everything that is part of the UI in Unity needs to be a child of a Canvas.
Key Points about Unity UI and Canvases:
- Canvas: The base component for all UI elements in Unity.
- UI Elements: Objects such as buttons, text, images, sliders, etc., that are used to create the user interface.
- Anchors and Pivot Points: Used to define the position and scaling behavior of UI elements within the Canvas.
For more detailed information on Unity UI, refer to the Unity UI Documentation.
Unity Sprites
Sprites are 2D graphic objects used in 2D games and user interfaces. They can represent anything from a single image to complex animations. In Unity, sprites are primarily used in the UI to display images.
For more detailed information on Unity sprites, refer to the Unity Sprite Documentation.
Step-by-Step Guide: Converting an Image to a Sprite
1. Importing the Image
- Open your Unity project.
- In the Project window, right-click on the
Assetsfolder (or any subfolder where you want to store your image). - Select
Import New Asset.... - Locate and select your image file, then click
Import.
2. Converting the Image to a Sprite
- Select the imported image in the Project window.
- In the Inspector window, set the
Texture TypetoSprite (2D and UI). - Click
Applyto save the changes.
3. Using the Sprite in Unity UI
- In the Inspector window of your prefab, locate the
Source Imageproperty. - Click on the small circle to the right of the
Source Imageproperty. - Select your newly created sprite from the list.
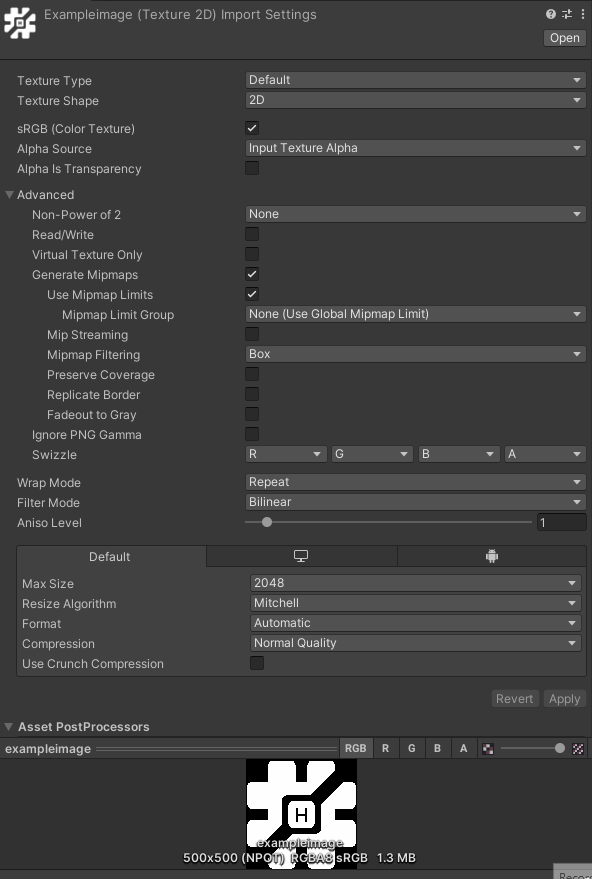
Changing the Resolution to Lower File Size
Optimization: You will likely need to lower your image resolution to save on file size and reduce the overall world size. Please ensure your images are properly converted and optimized to avoid compatibility and performance issues.
To reduce the file size of your sprite, you can change its resolution. Here’s how:
- Select the sprite in the Project window.
- In the Inspector window, under the
Advancedsection, find theMax Sizeproperty. - Reduce the
Max Sizeto a lower value (e.g., 512, 256, or 128 depending on your needs). - Set the
Compressionproperty toNormal QualityorLow Qualityto further reduce the file size. - Click
Applyto save the changes.
By following these steps, you can efficiently add images to your prefabs and use them as sprites in Unity UI, ensuring that your project remains optimized and user-friendly.
For more detailed information on optimizing sprite size and resolution, refer to the Unity Sprite Optimization Documentation.