Setting Up Post Processing in Unity
Important: This guide is for Unity 2022.3.6f1. The steps may be different in future versions of Unity.
Post processing is an essential tool in Unity that enhances the visual quality of your scenes by applying effects such as bloom, color grading, and depth of field. This guide will walk you through the process of setting up post processing and adding it to your camera.
What is Post Processing?
Post processing in Unity refers to the process of applying visual effects to a camera's rendered image before it is displayed on the screen. These effects can significantly improve the visual fidelity of a game by adding enhancements that simulate real-world camera effects.
For more detailed information on post processing, refer to the Unity Post Processing Documentation.
Adding a Post Processing Volume (By Yourself)

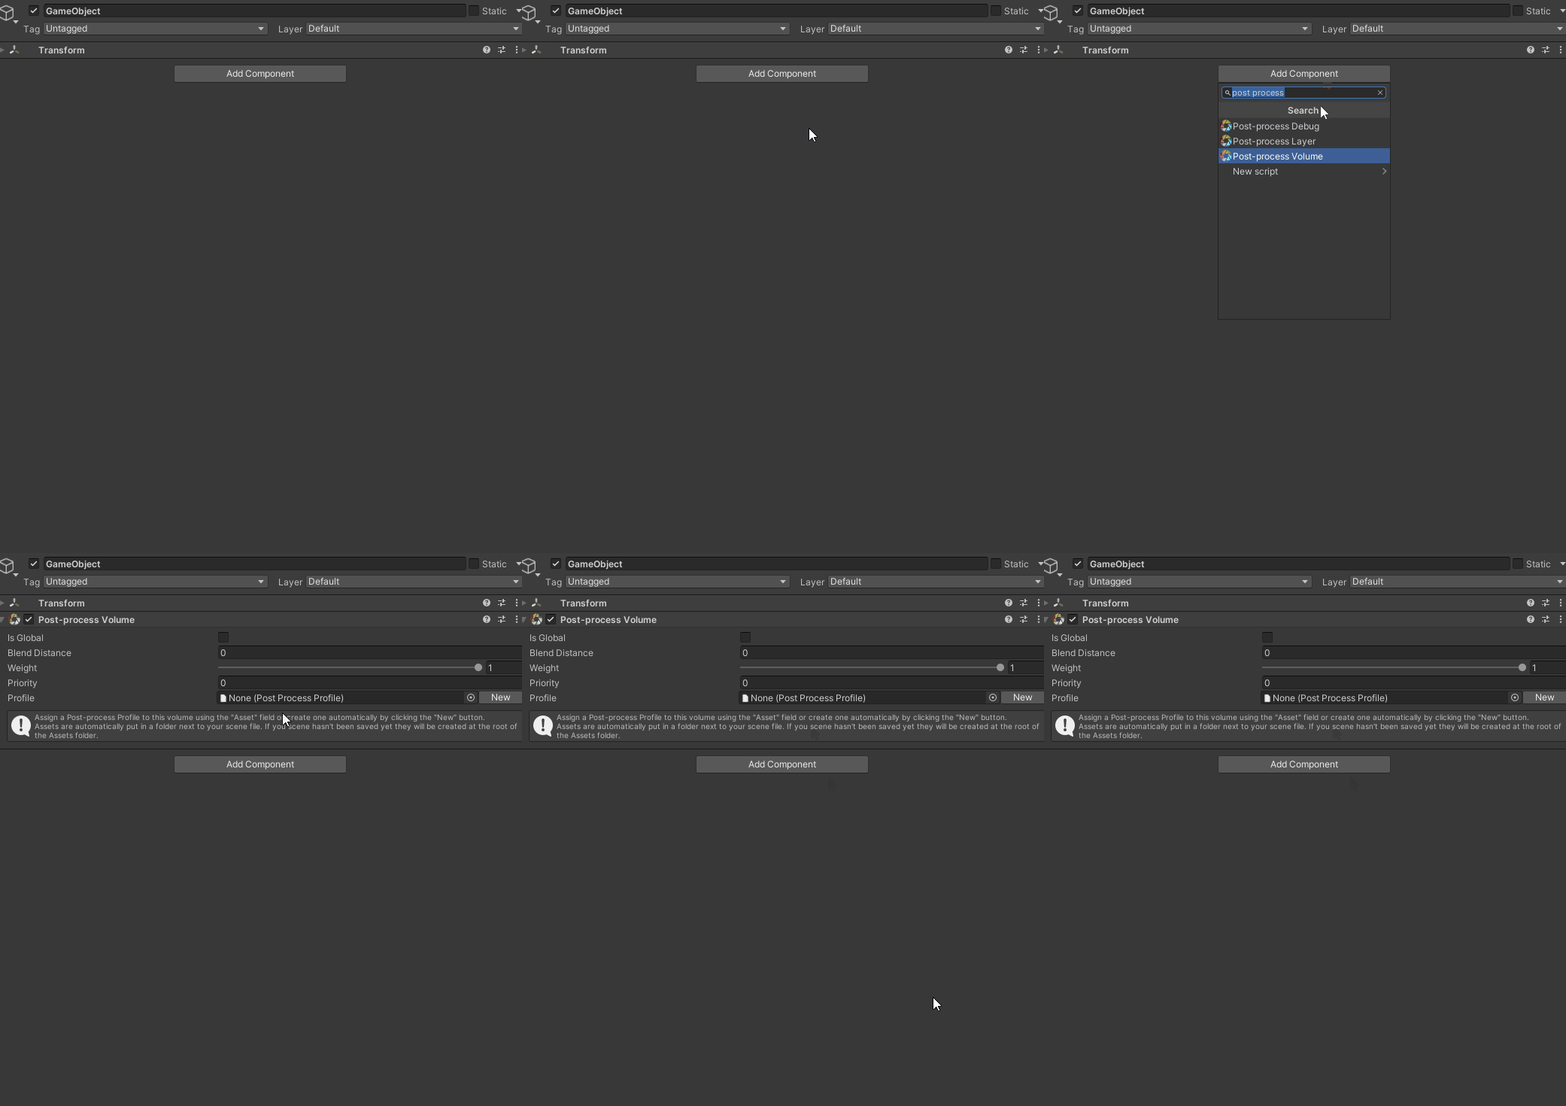
- Create a Post Processing Volume:
- In the Hierarchy window, right-click and select
Create Emptyto create a new GameObject. - Rename this GameObject to
PostProcessingVolume. - With the
PostProcessingVolumeGameObject selected, clickAdd Componentin the Inspector window. - Search for and add the
Post-process Volumecomponent. - In the
Post-process Volumecomponent, check theIs Globalcheckbox. - Click
Add Overrideand select the effects you want to apply (e.g., Bloom, Color Grading).
- In the Hierarchy window, right-click and select

-
Create a Post Processing Layer:
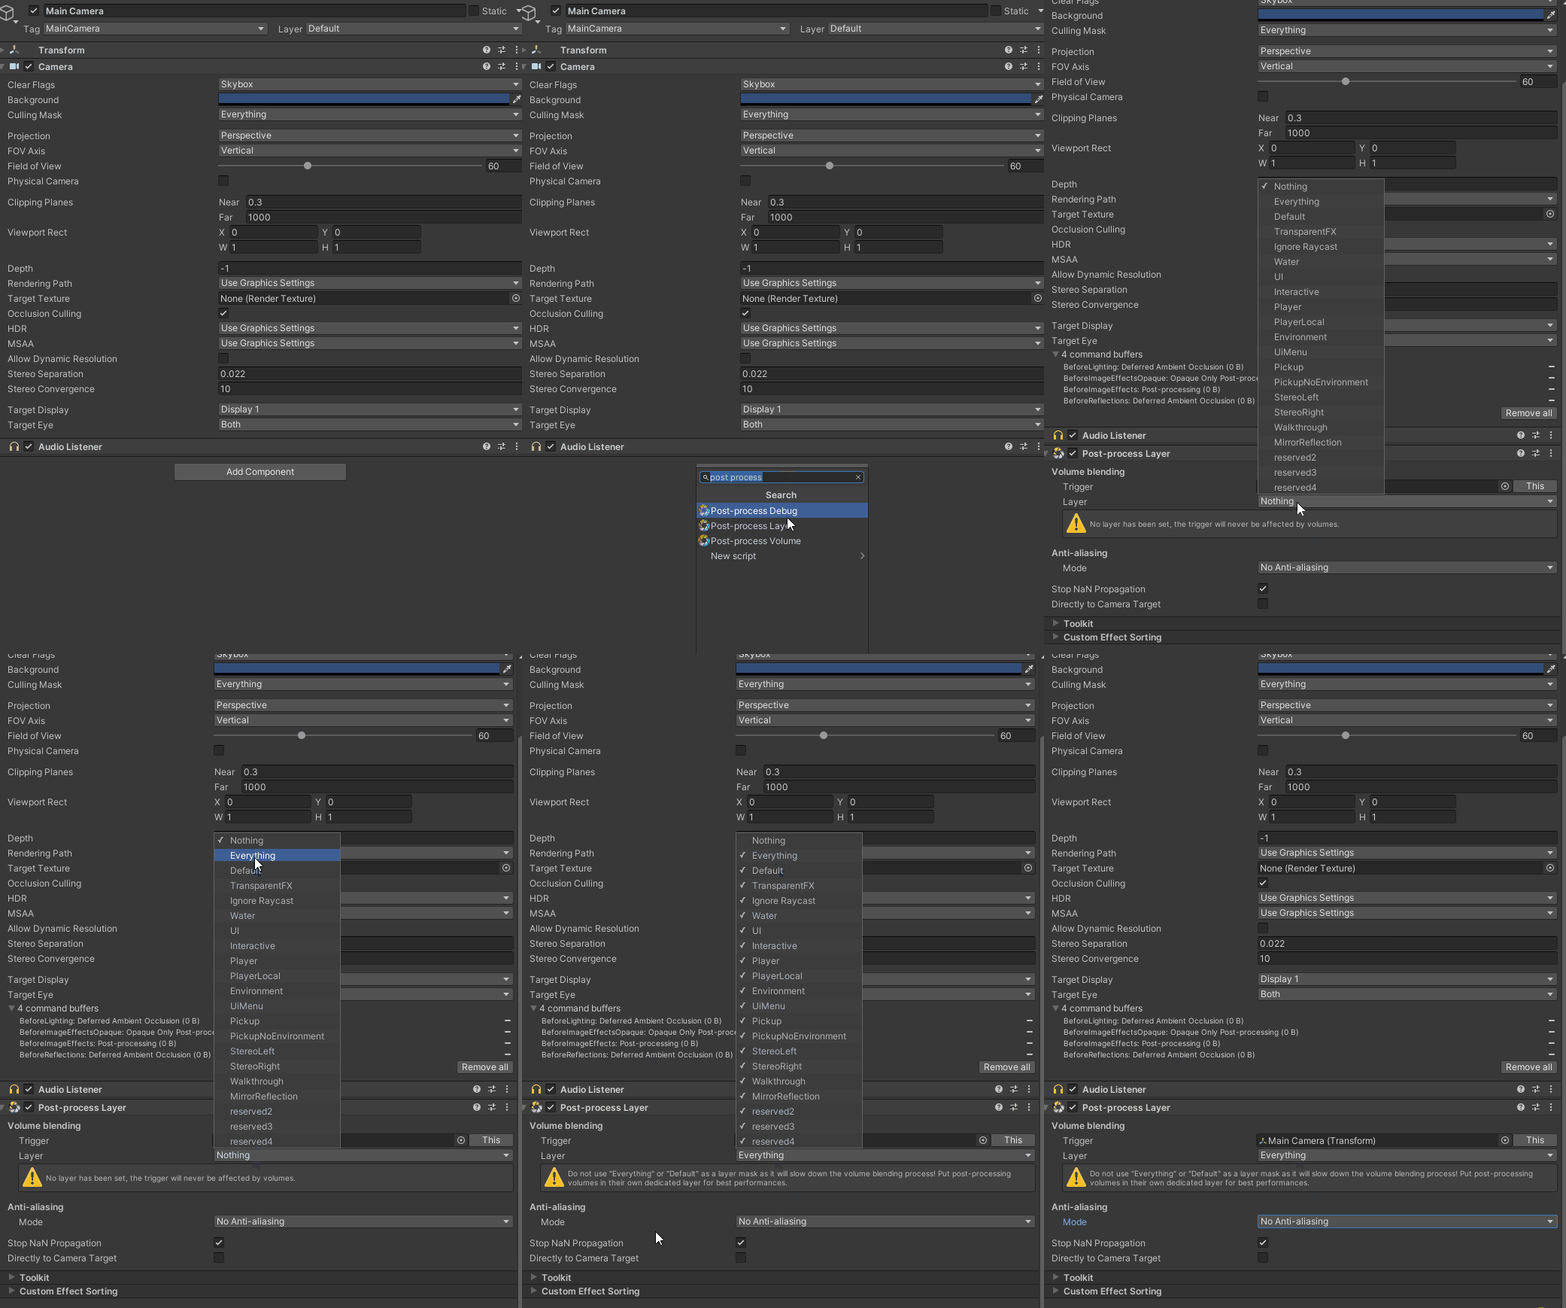
- In the Hierarchy window, select your Main Camera.
- In the Inspector window, click
Add Component. - Search for and add the
Post-process Layercomponent. - In the
Post-process Layercomponent, set theLayertoDefault.
-
Configure the Post Processing Layer:
- In the
Post-process Layercomponent, set theLayertoDefault. - Under the
Post-process Layercomponent, selectDefaultfrom theLayerdropdown menu. - Ensure that
Volume Blendingis set toLocal.
- In the
Adding a Post Processing Volume (From Our Prefabs)
-
Install Our Prefab:
- Download the prefab from our store.
- Import the prefab into your Unity project:
- In Unity, go to
Assets>Import Package>Custom Package... - Locate and select the downloaded prefab package.
- Click
Importto add the prefab to your project.
- In Unity, go to
-
Locate the Post Processing Volume:
- After importing, navigate to the prefab directory in the Project window.
- Locate the
PostProcessingVolumeGameObject included with the prefab.
-
Add the Post Processing Volume to Your Scene:
- Drag the
PostProcessingVolumeGameObject from the prefab directory into your scene.
- Drag the

- Set Up the Camera:
- In the Hierarchy window, select your Main Camera.
- In the Inspector window, ensure the
Post-process Layercomponent is added and configured as mentioned earlier.
By following these steps, you can install post processing in Unity, add it to your camera, and configure the desired effects to enhance the visual quality of your scenes.
For more detailed information on post processing, refer to the Unity Post Processing Documentation.